🏠
 en ⟩
en ⟩  Apps - Software ⟩
  GIMP ⟩
 How to blur the background of image (GIMP)
How to blur the background of image (GIMP)
created 10.2 y • edited 10.2 y by Ziggy • Updates history (2)

●● Average 🚩 22 steps 🕗 30 minutes
To blur the background of image (GIMP), you need 1 thing:

 Find info page about GIMP
 Find a guide to know how to make a GIMP
Open GIMP and load your photo
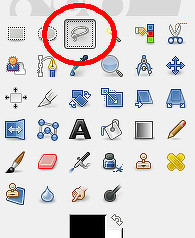
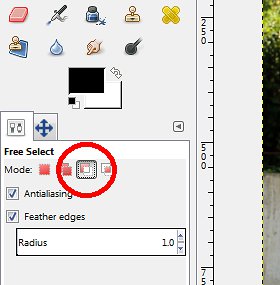
Click "free select"
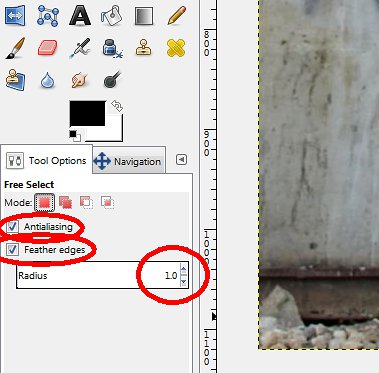
Enable "Antialiasing" & "Feather edges"
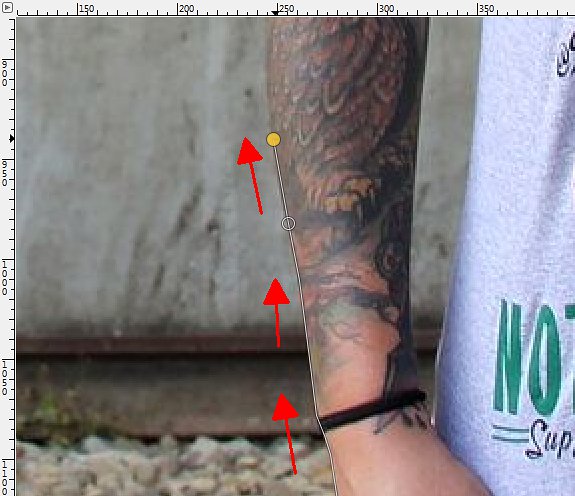
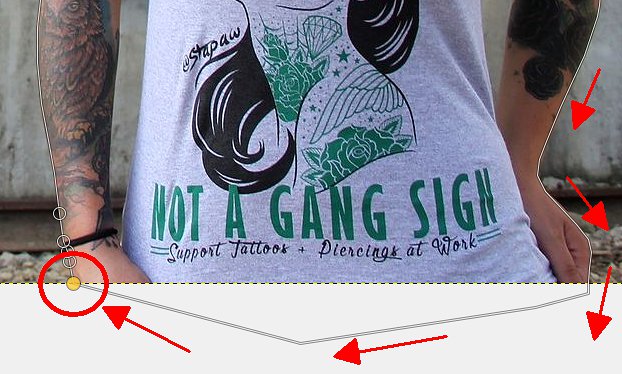
Start selection
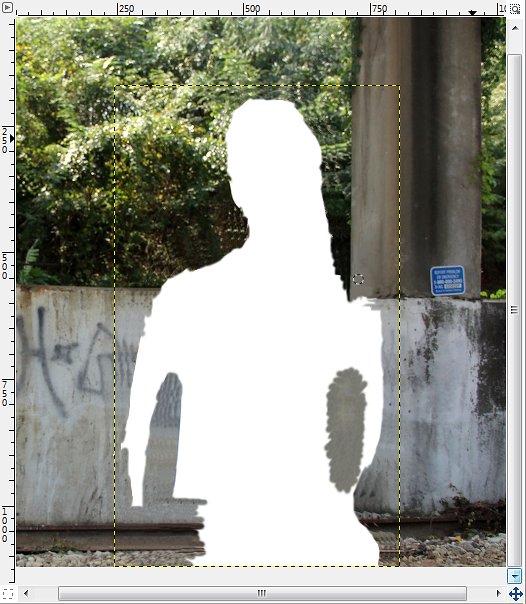
Complete the selection
Check the result
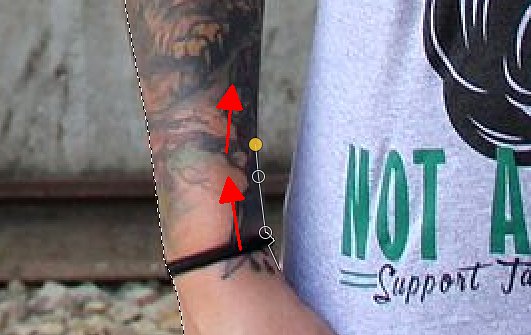
Set "Free Select" to "Subtract mode"
Select the part to remove
Check the result
Repeat operation
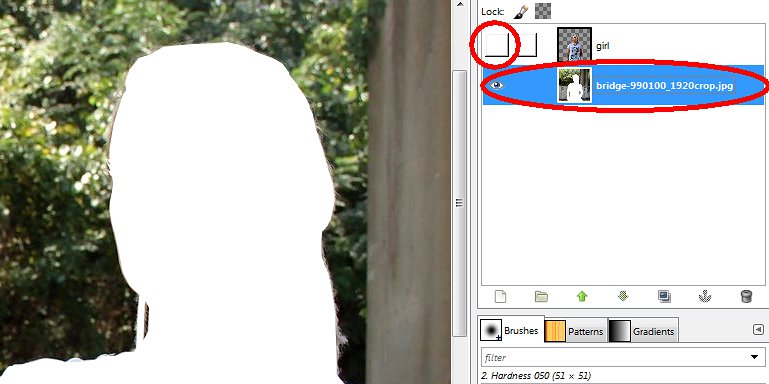
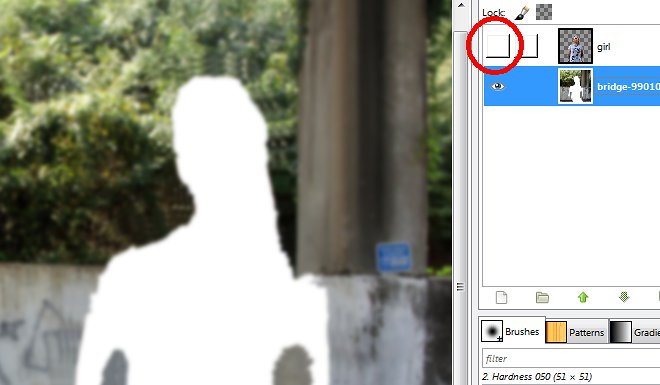
Make the entire selection "float"
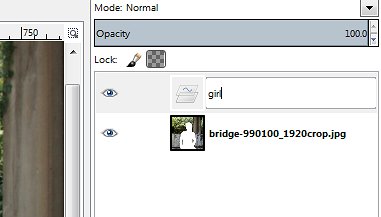
Rename the layer
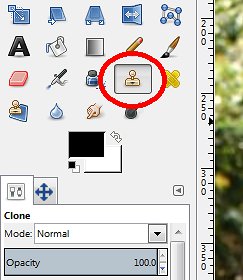
Hide the girl and focus on background layer
Take the "clone" tool
Set the source circle and the destination circle
Paint with the clone tool
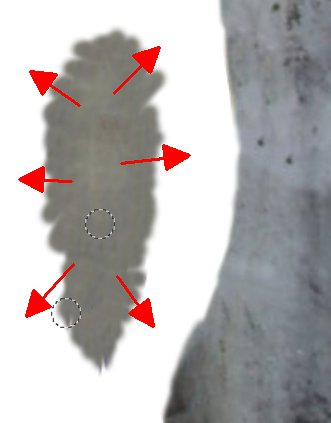
Repeat step 15 but horizontally
Clone arround with the same source
Check the result
Blur the background
Set the blur radius
Unhide the girl

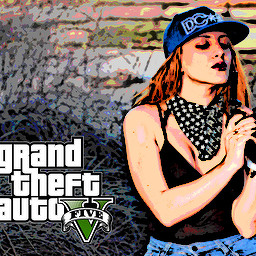
In the image below you can see some cool examples of nice photos with blur backgrounds I found (photo credits in outro).

1
 (photo credits in outro).
2
• the girl
• the background
For this, we need the "free select" tool. Click the lasso icon to use it.
3
• Check "Antialiasing"
• Check "Feather edges"
• Set Feather edges Radius to
1.0
4

Use middle mouse button to easily scroll in the image while using the selection tool!
5
6
GIMP saves the active selection when you save your work in XCF file. Save now your current work (by clicking
File
then Save As...
) so the selection will be saved too!
7
8
9

10
11
Select
then Float
. This will cut the active selection and immediately make another layer with the selection. Now the image has 2 layers: the background and the girl.
Float
is a shortcut to cut and paste as a new layer.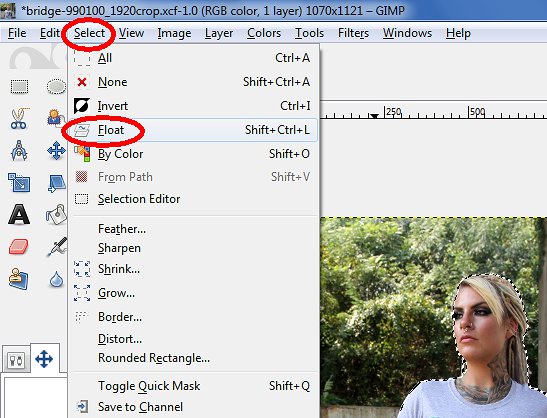
12
13
14
15
Ctrl
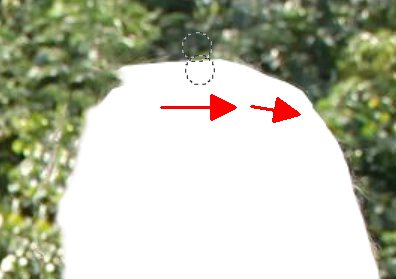
then click somewhere in the image. Here, we want to clone the background into the white part so just set the source in (1) then put your mouse at the right side of it to get ready to clone. 1
is the source circle 2
is the destination circle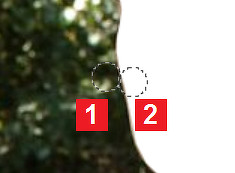
16
17
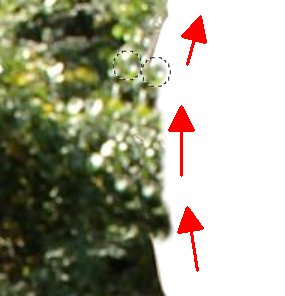
• Set the source circle up then put your mouse on the bottom
• hold left click and clone all the way to the right
18
19
20
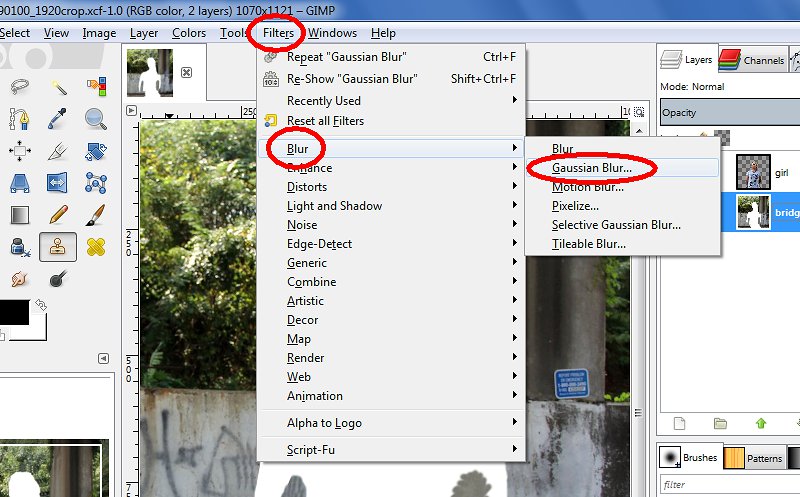
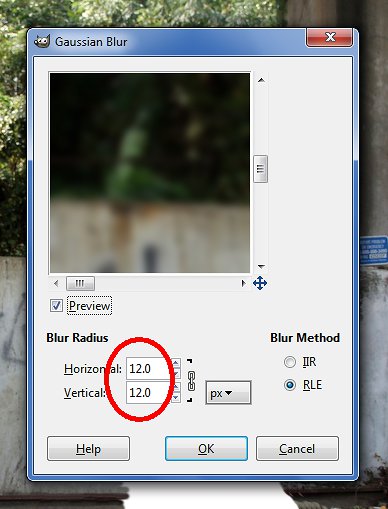
Click
Filters
> Blur
> Gaussian Blur...
21
12.0
Check "Preview" to preview the result so you can adjust the blur radius!
22
Now you can save/export your photo!
Photo credits
Intro montage:
pixabay.com/en/girl-sitting-tree-wa…
pixabay.com/en/female-mobile-phone-…
pixabay.com/en/pretty-young-female-…
photo used for how-to:
pixabay.com/en/bridge-dreads-dreadl…

◄ GIMP
GIMPHave some advice, techniques or tips to share about GIMP?
📝 Create a guide
📝 Create a guide


 DM
DM


Sponsored
What do you think of blur the background of image (GIMP)?

No comments. Be the first!
Follow comments of this guide by clicking the Follow button above!
Follow comments of this guide by clicking the Follow button above!